"Equipped with
his five senses, man explores the Universe
around him and calls the adventure science"
- Edwin P. Hubble
|
"Equipped with
his five senses, man explores the Universe
around him and calls the adventure science"
- Edwin P. Hubble
|
 |
07/01/19 - Previous
dark sky site near Riley Ks. Moved from there to
Wichita several years ago and into moderately-heavy
light polluted skies (Bortle 7). I'm setting up
two imaging platforms that can easily roll out onto my
driveway and can be up-and-going in a matter of
minutes. Now it's a matter of learning how to deal
with the light pollution which introduces a variable and
unpredictable gradient. It's clear that good
flat-fields are a must, as is settling on a good
post-processing method to remove the light pollution
gradient. |
|||
 |
07/15/19
- Finally completed both telescope
carts & I can now roll these out and be up and
imaging pretty quickly. I also tweaked the DEC
worm gear to resolve back-lash issues and now my little
Meade LXD-75 is guiding surprisingly well for not being
specifically designed to guide. I'm using the
ASCOM/INDI driver for classic Meade LXD-75 through PHD2
or through Astroguider™ to send guiding signals. *Orion 100mm (FL=600mm) Achromatic Refractor @f/6.0 w/Orion 50mm StarShoot autoguider • Meade LXD-75 Mount SBIG ST-8300m CCD w/Nautilus 4x2" Filter Wheel & LRGB Filters MaximDL, AstroImager image acquisition/processing & PHD2 guiding software |
|||
 |
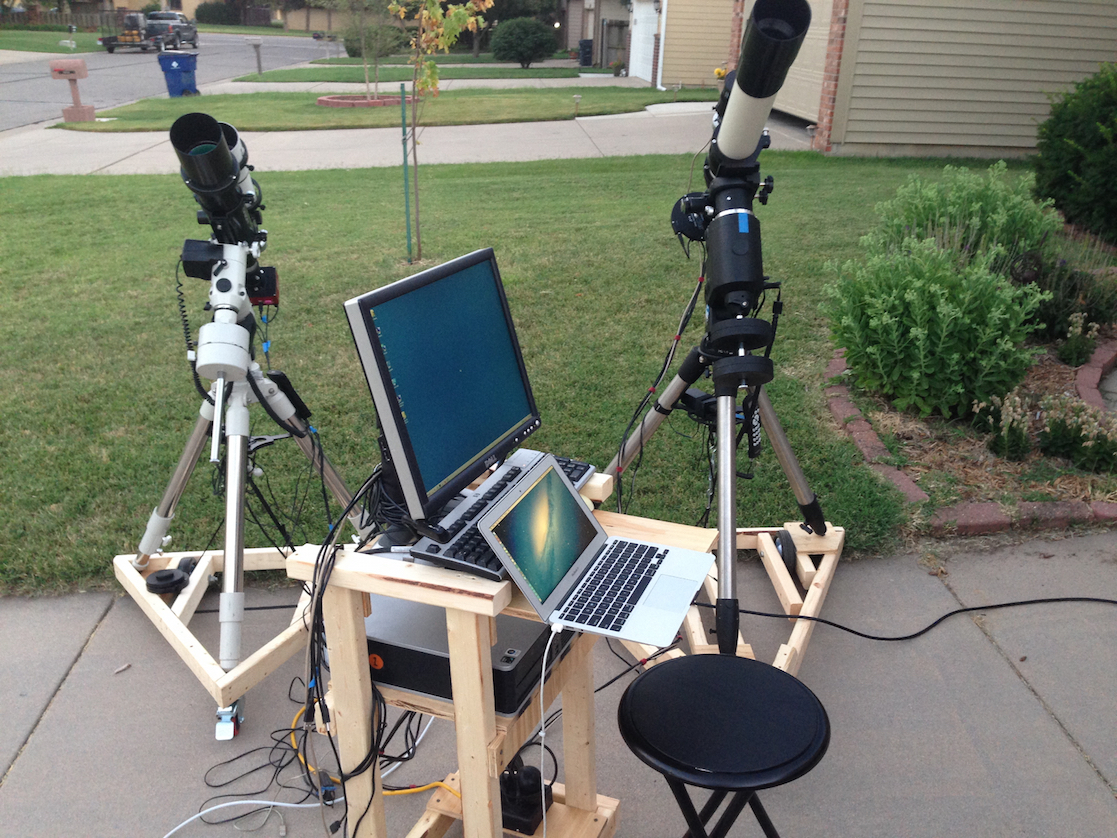
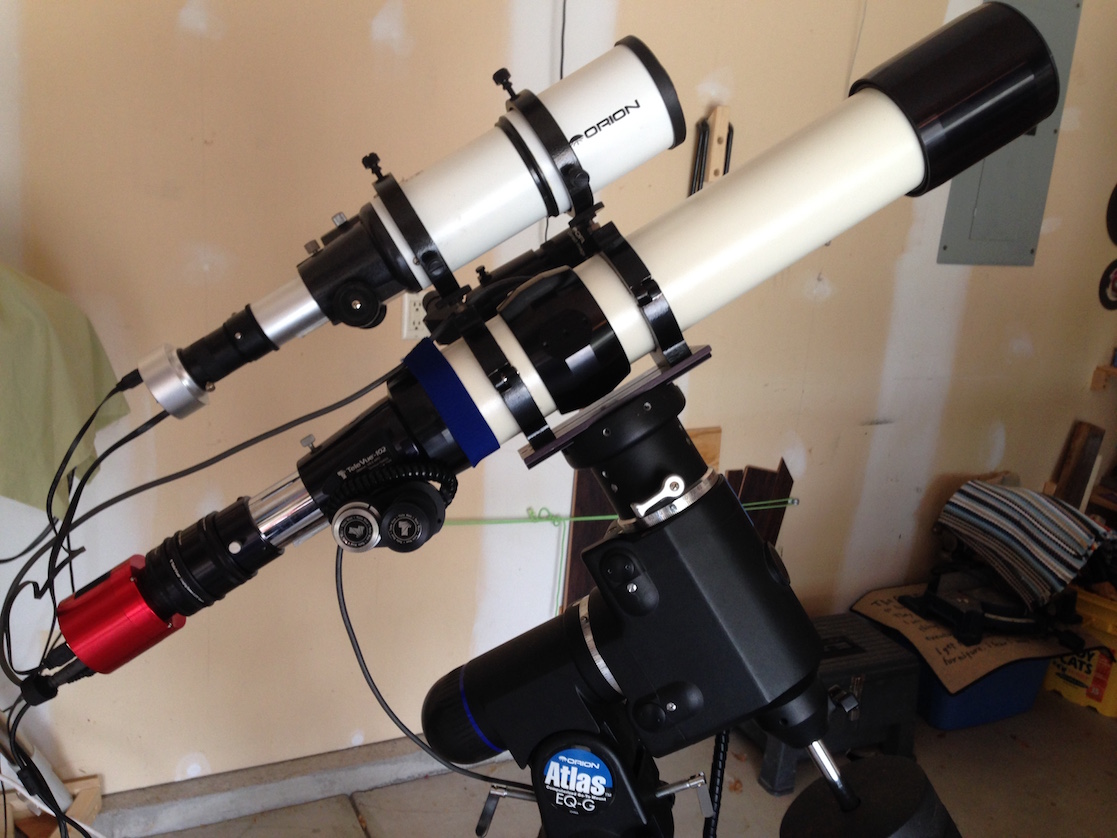
07/24/19
- Settling on the simplified set-up pictured to
the left. Seems to be the best combination of
performance & convenience that I have. I added
a V-Block filter to the guider which helps to make the
stars in the guiding image very small and
point-like. I also use a Bahtinov mask to get very good focus
on both the Televue main imager and the guider. †Televue 102mm (FL=880mm) Apochromatic Refractor w/0.8x focal reducer/field flattener @f/6.9 Orion Atlas EQ-G Mount • SBIG ST-8300m CCD w/Orion Nautilus filter wheel & 2" LRGB Filters Orion 80mm (FL=400mm) Achromatic Refractor @f/5 & Orion StarShoot Autoguider w/V-Block filter MaximDL, AstroImager image acquisition/processing & PHD2 guiding software |
|||
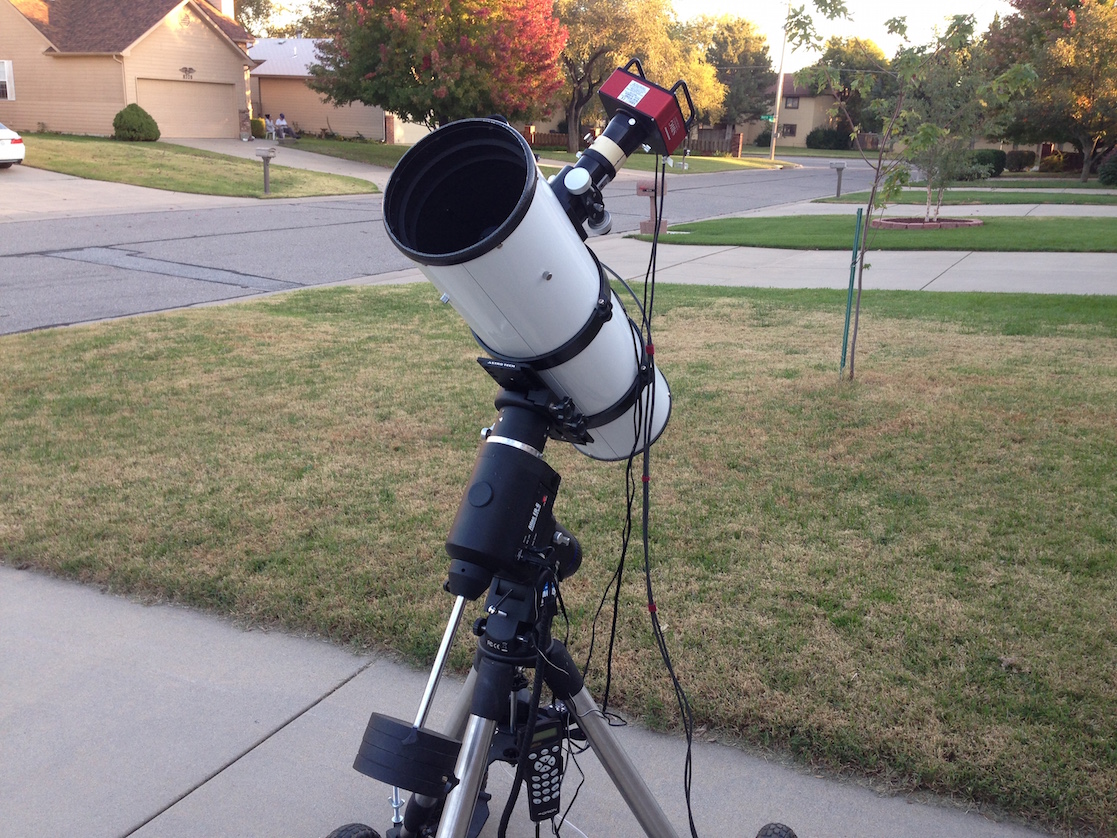 |
08/28/19
- Configuring and testing another set-up.
This is the AstroTech 8 IN (Imaging Newtonian) w/SBIG
8300c camera and Orion 50 mm StarShoot Autoguider.
I've always had trouble with its primary mirror easily
going out of collimation. I found that it was the
push/pull, spring loaded adjusting bolts that were
"sticky" and just needed aligned and secured.
Seems to be holding a collimation relatively well
now. This set-up might have the necessary light
gathering power to compliment the SBIG 8300c's lack of
sensitivity. This orphan has been adopted by Dr. Luke Schmidt of Texas A&M!! Thanks Luke for providing a good home :-) |
|||
 |
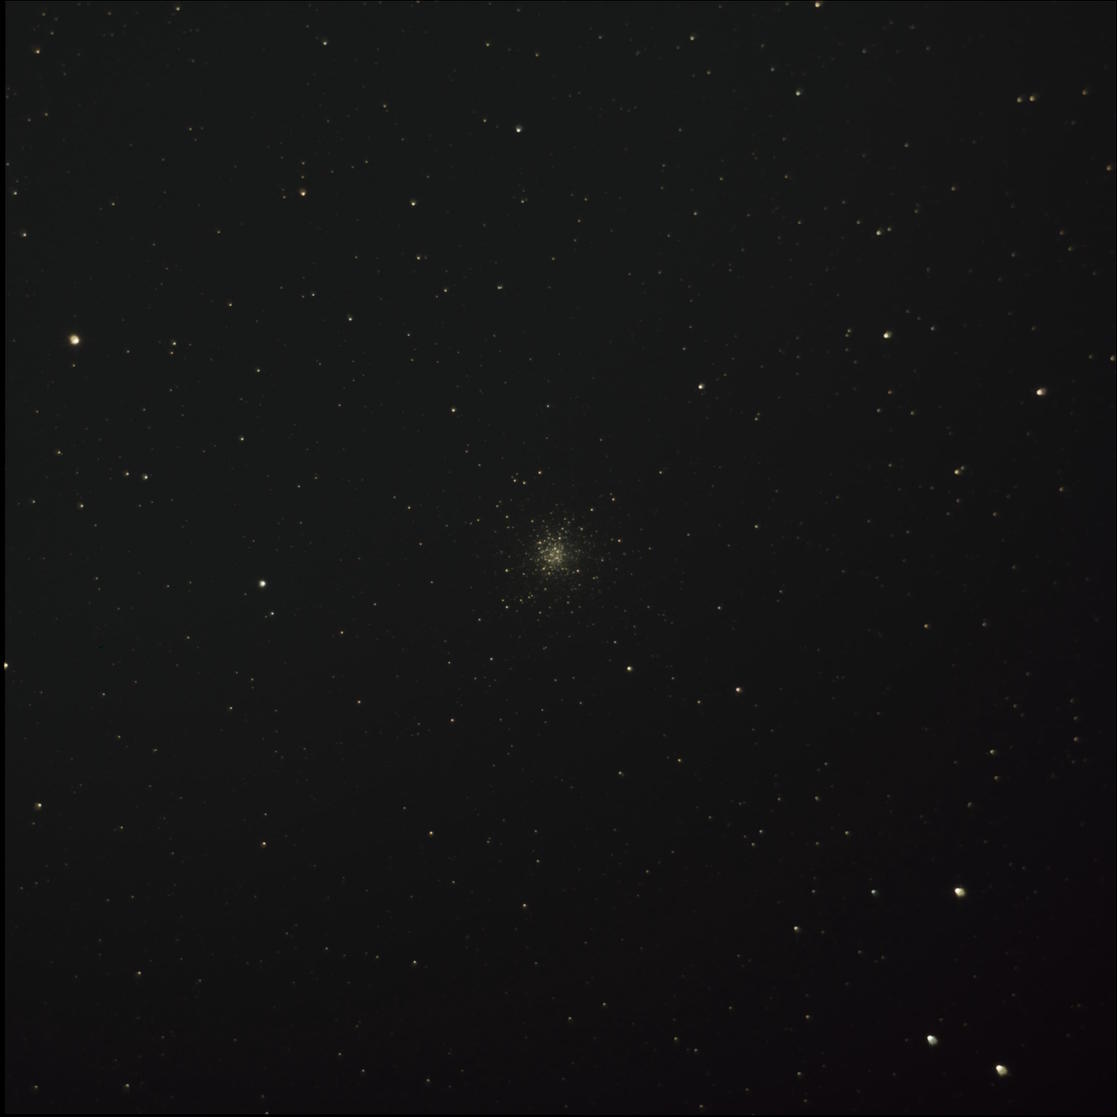
05/03/20
- Ordered a ZWO CMOS camera and a dual
narrow-band filter... 05/09/20
- CMOS camera arrived and I installed it onto the
Televue 102mm without the TV focal reducer for a focal
length of 880mm. This gives me a nice field of
view for smaller objects like galaxies and planetary
nebula. Imaging with the CMOS, which is much more
sensitive than the SBIG CCD camera, is a very different
experience than the traditional "long exposure, dark-sky
with very good tracking" imaging that I am used
to. Basically, one uses relatively short exposures
(5s to 2 min) and live-stack many images to develop a
high resolution, high signal-to-noise ratio, one-shot
color image of your target. An example of my first
image test can be found above for M13. The
resulting image is very different from the grey-scale,
washed out, images that I've previously been able to get
of globular clusters and is a much better representation
of what a globular is really supposed to look
like: very old, yellow stars that are
distinguishable one-from-the-other. |
|||
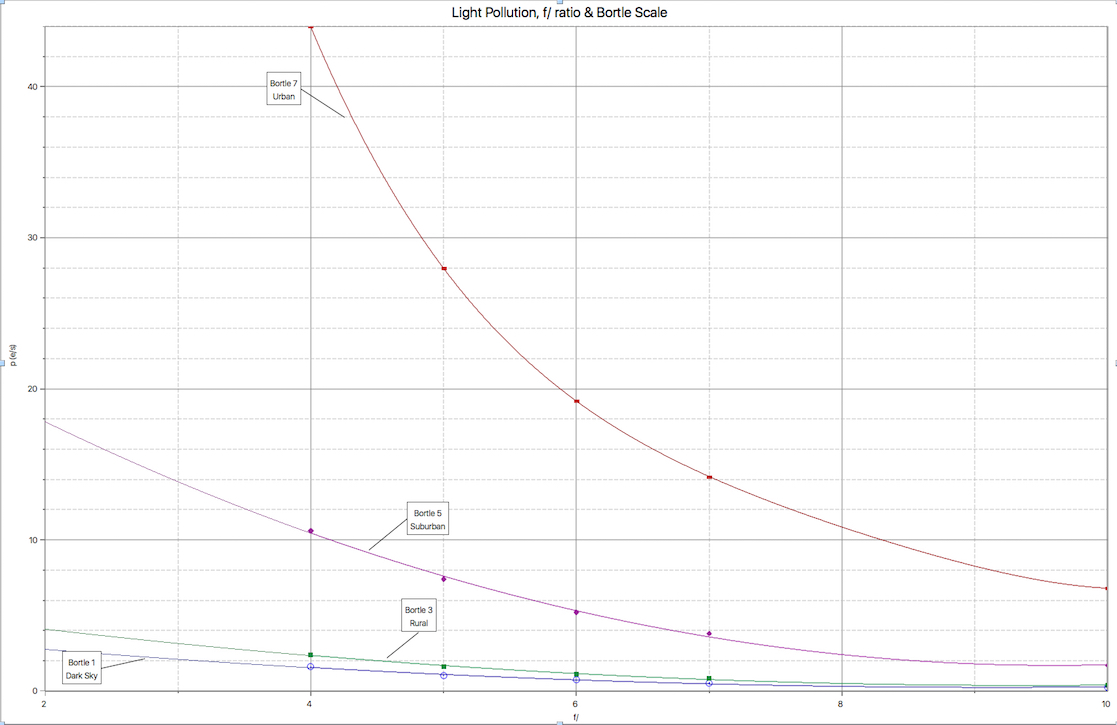 Light Pollution as a function of f/ (Click on image for a larger view) |
05/13/20
- In the never ending fight against light
pollution vs image quality I found these three links
very helpful: The first is a very good analysis of
the optimum length for sub-exposures as related to read
noise and light pollution by Dr Robin Glover (LINK),
the second is a discussion on how f/ ratio affects the
signal and therefore the exposure time (LINK)
and finally this handy page of formulae (LINK).
Unfortunately f/ ratio affects the amount of light
pollution a chip sees since a fast telescope (small f/
ratio) grabs more light per unit time, including
unwanted light pollution. So, f/ ratio and
sub-exposure time are linked. Fortunately as
amateurs we're mostly concerned with getting the best
images that we can reasonably get in a relatively short
period of time (maybe ~ 2 hrs). That means we can
make some dramatic simplifications to the calculations
and still end up with some very nice results.
Let's assume that your CCD or CMOS is of typical pixel
dimensions (~ 4 to 6 µm pixel size), that you're binning
1x1 and that you are willing to accept a 5% increase in
noise over the ideal, noiseless image. Then: t ~ 10(R2/Qp)
where R =
read noise (electrons/photon), Q = quantum
efficiency of camera (electrons/photon), p =
light pollution (electrons/photon•second) and t =
time per sub-exposure. Read the approximate
light pollution as a function of f/ ratio and Bortle
scale from the chart to the left, plug in your read
noise and quantum efficiency into the above equation
and you have a rough idea of the time per
exposure. That's it! Always remember: The
more exposures you have in your stack the better.
As an example let me calculate the expected sub-exposure times for my cameras, one a CCD camera and the other a new ZWO CMOS camera, on the same f/8.6 telescope: At f/8.6 in my Urban skies (Bortle ~7) the light pollution is p ~ 9. That would be the same value for both calculations but the cameras have vastly different read noises and quantum efficiencies. For the SBIG ST-8300 its read noise is about R = 9 and its quantum efficiency is about Q = 0.4 (40%) and the ZWO ASI533's read noise is about R = 1.5 (with proper gain settings) and its quantum efficiency is about Q = 0.8 (80%). The results are remarkable: tSBIG =
225 seconds (3.75 min)
tZWO = 3 seconds Both times are
doable since my tracking is good but the major
difference is that in an expected 2 hr (7200s)
session and switching between the LRGB filters on
the SBIG that only gives me a few images to
sum-stack with each filter.
Conclusion: It is really only feasible to
image either monochrome or in a single (or at
least few) filters with the CCD camera whereas the
one shot color ZWO CMOS camera can stack literally
hundreds to thousands of images in the same
time.
NOTE: Some quick-and-dirty (and highly simplified) corrections to sub-exposure time: 1) If you're
using RGB filters or a color camera multiply by 3.
2) If you're using Narrowband filters: 12nm bandwidth multiply by 25 and 3 nm bandwidth multiply by 100 3) Divide by the binning factor. Example: divide the time by 2 if binning 2x2 |
|||
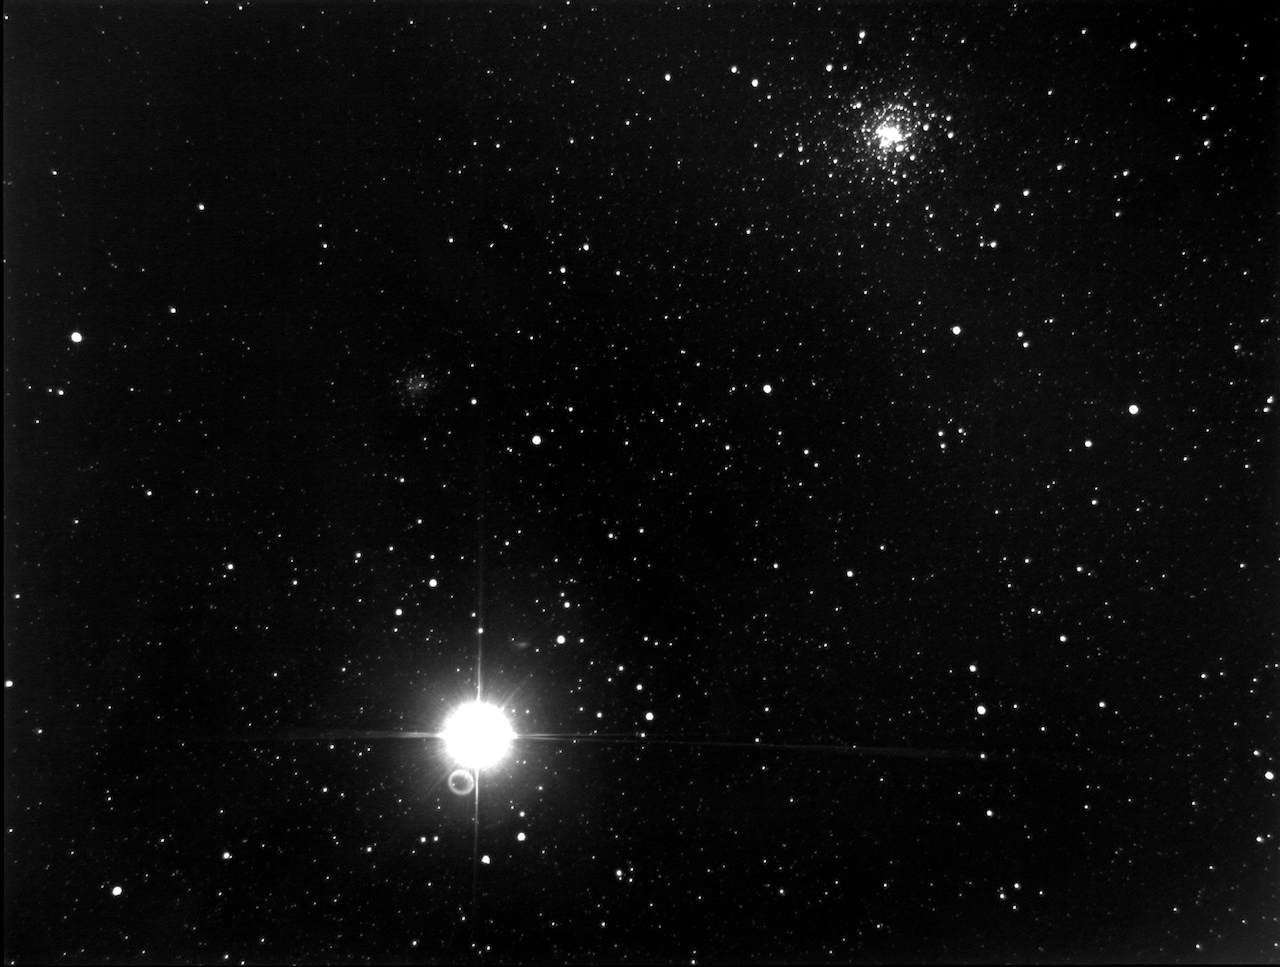
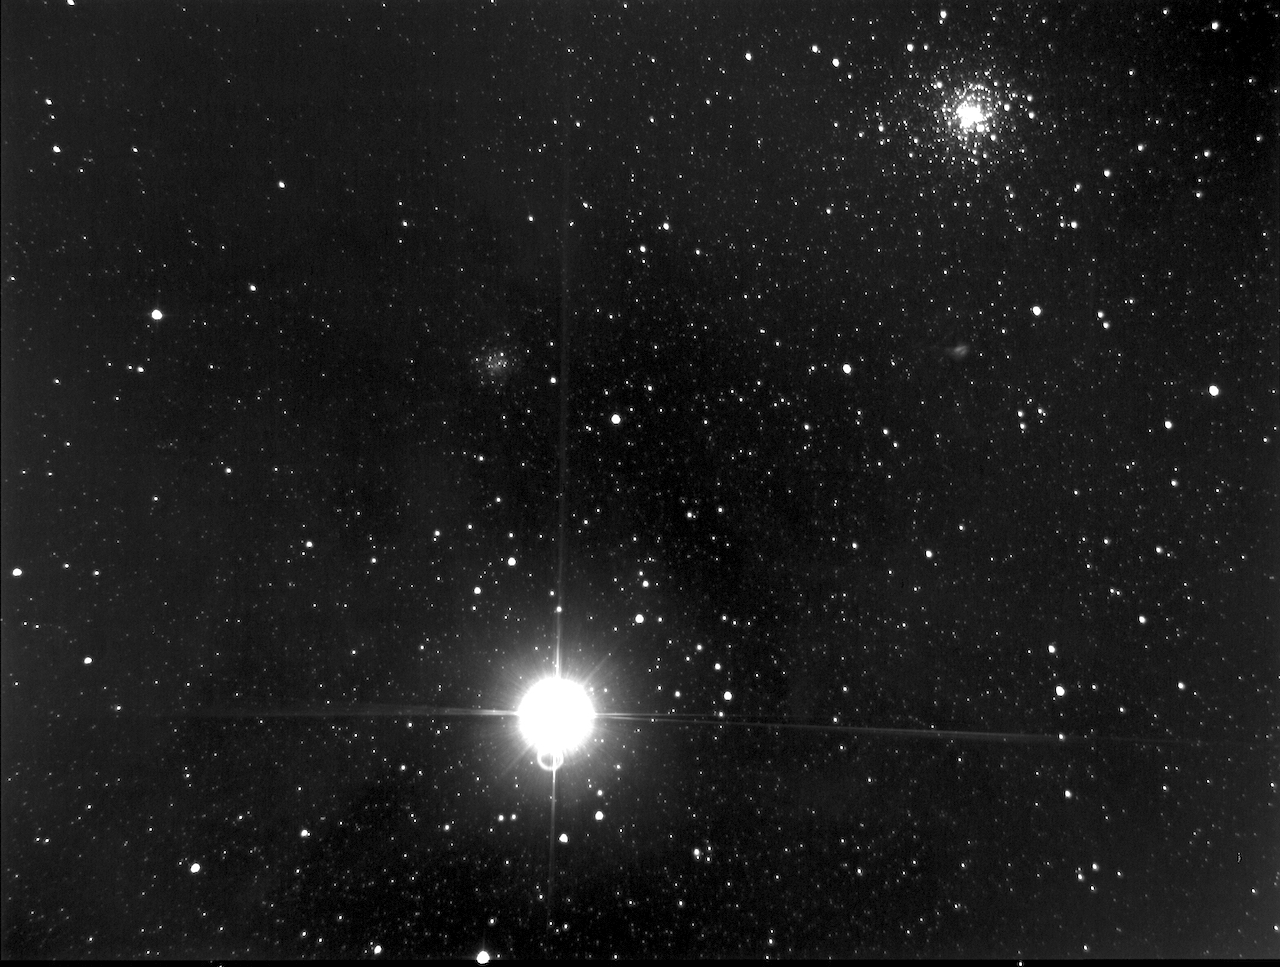
| Denebola M10 M13 |
05/13/20
- Switching the 102mm Televue to an 8in Orion
Newtonian for a tight Field of View rig with the ZWO ASI533MC camera
and Orion 60mm helical scope / ASI120MM Mini guider
. The Televue needs to go back to its home
where it belongs. 05/21/20 - Tested a 4.5" Orion Newtonian @ f/4.0 w/50mm Orion SS autoguider on the Meade LXD-75 & the ZWO ASI533 camera last night. I wanted to see how well the whole set-up worked and how much coma was present on such a fast newt. As you can see from the links to the left there is pretty significant coma although the central object is pretty nice. These are 30s images stacked with ASILive and processed using Apple Preview. The Meade guides very well connected to my Macbook Air / PHD2 through the INDIGO Server from Cloudmakers. The ZWO is very light and its built-in USB hub is very convenient. My testing has shown that this little rig might be a viable set-up but it will definitely need a coma corrector to be usable... on to the next equipment testing. |
|||
Markarian's
Chain 34 x 90s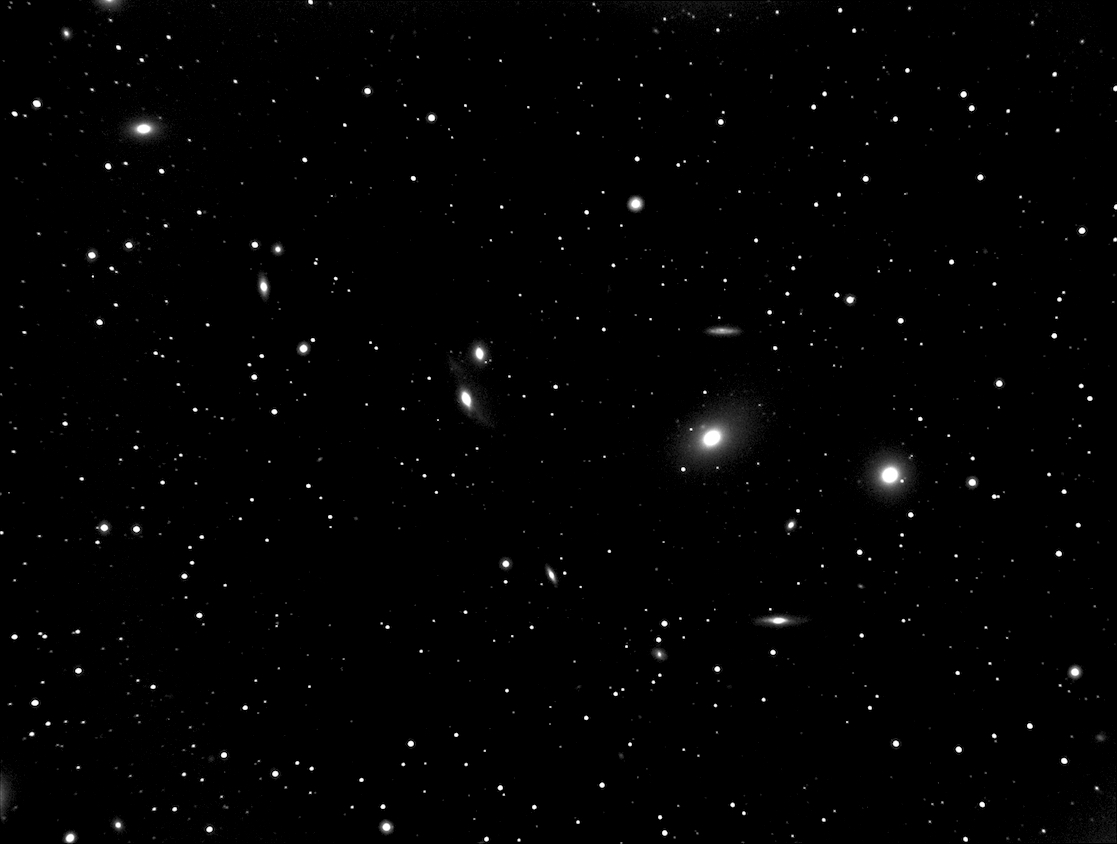 M57 25 x 60s  |
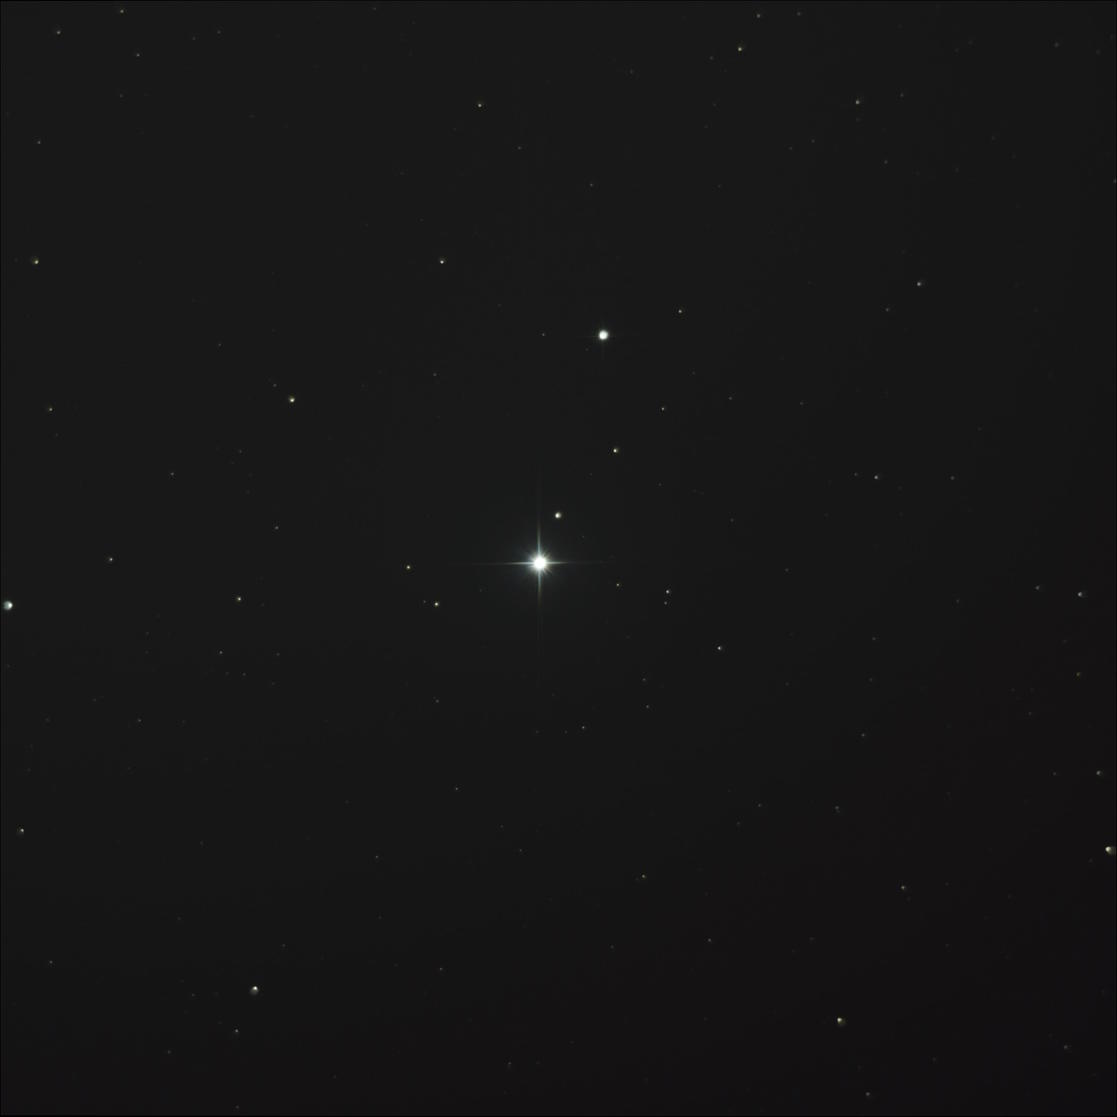
05/27/20 - Tested the Optolong CLS
Light Pollution filter last night on Markarian's Chain
using the 100mm Orion Achromatic refractor @
f/6.0. It definitely cuts down on the murky haze
and makes images much clearer and with higher contrast
- unfortunately the test image to the left clearly
shows significant chromatic abberation on the bright
stars in the image. I don't think that little
refractor will be of sufficient quality for me to
image with. I'll try out the 4.5" Newt once the
Baader MPCC Coma Corrector comes in. Next, I'll
put this filter and the ZWO ASI533 on the 8" Newtonian
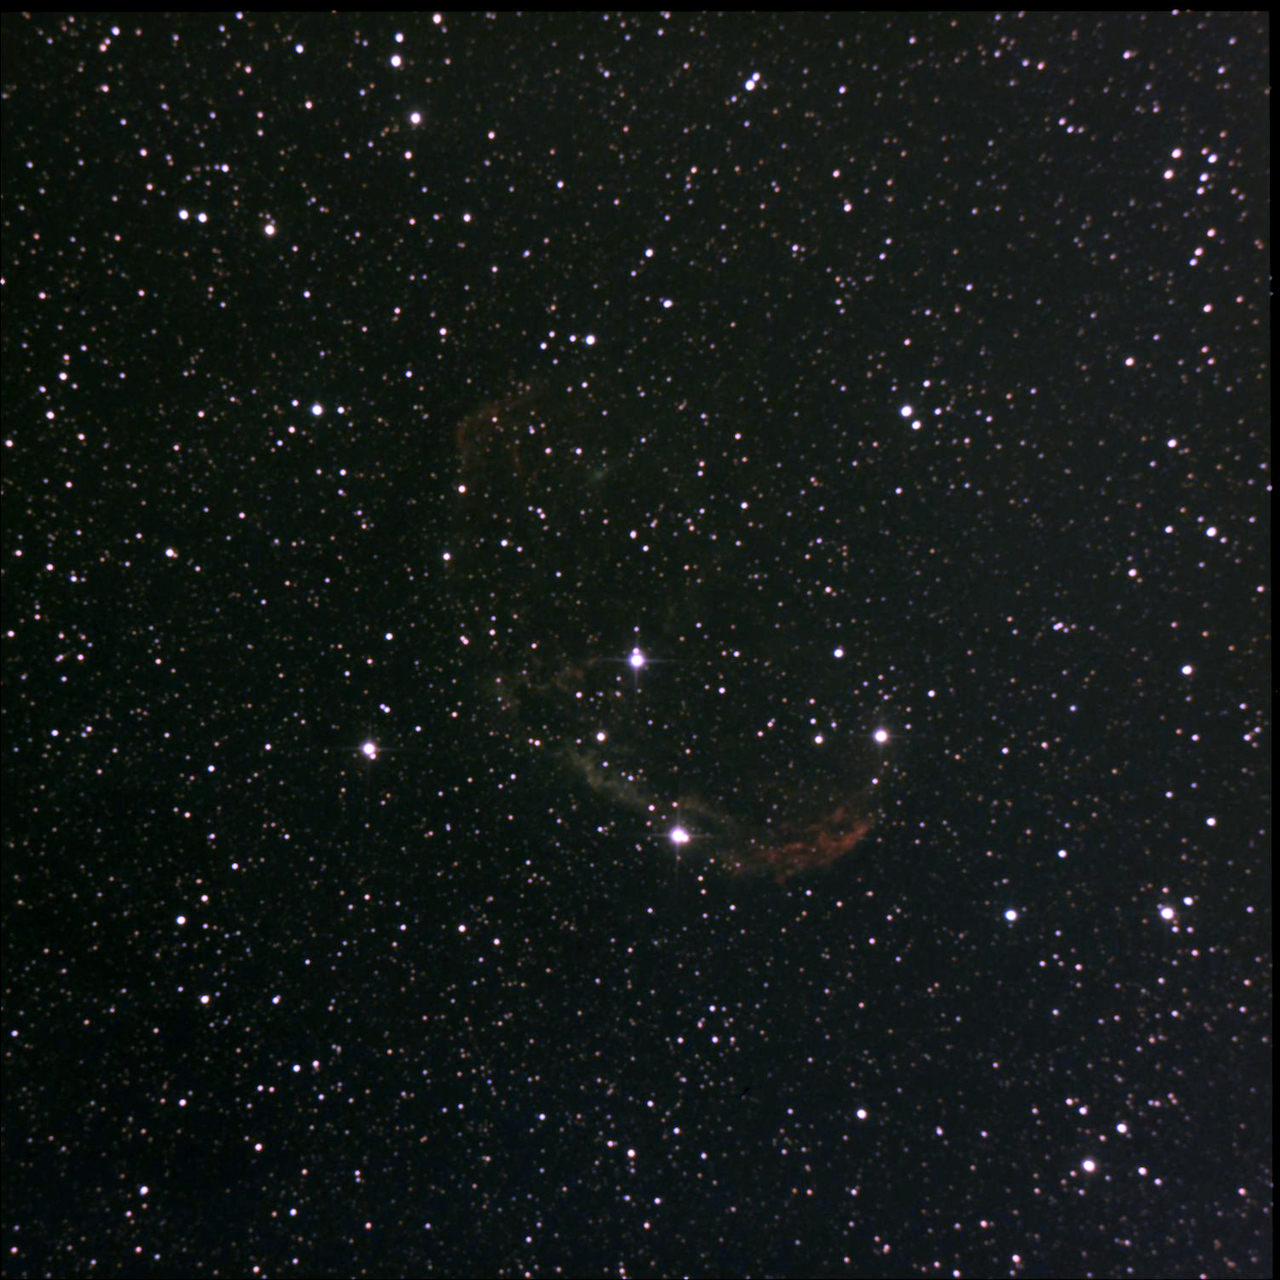
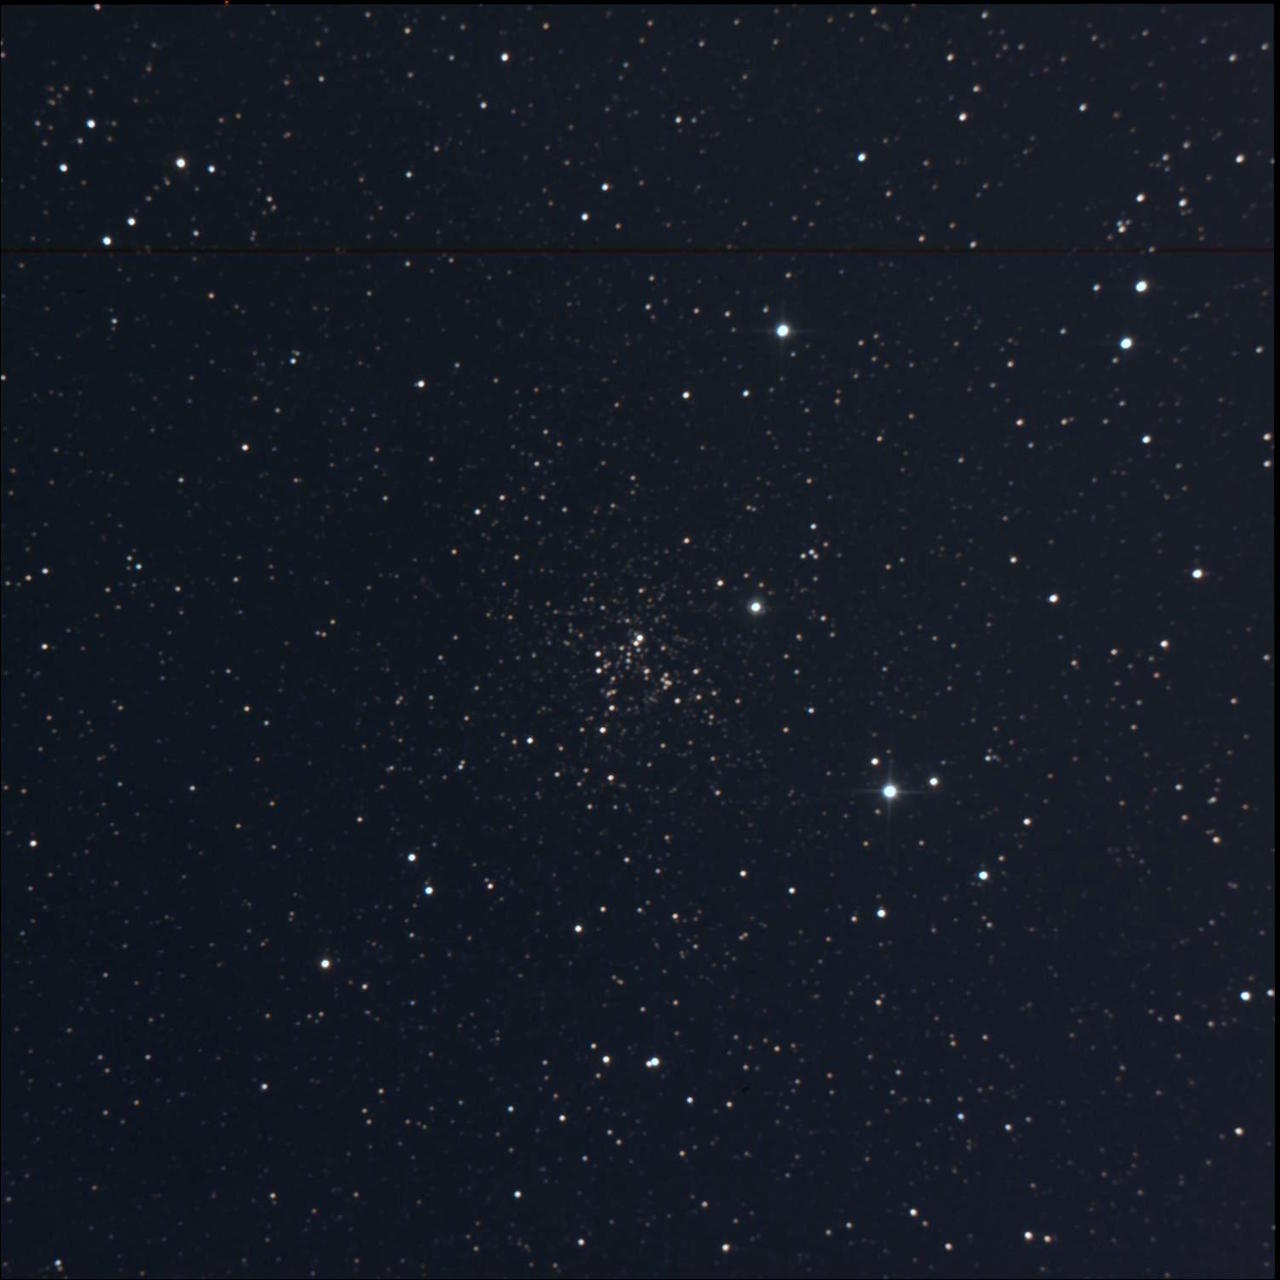
to see what it does there. 05/28/20 - Tested the 8in Newtonian with the Optolong CLS Filter and ZWO ASI533 last night. Seems to be working pretty well. The Newtonian does show some coma and the filter boosted the contrast so there's still a little work to do to get things optomized. I still need to install the Shoestring Astronomy FCUSB focuser and get some good Bias, Darks & Flat frames to calibrate. A test image of M57 is linked to the left. 05/29/20 - Superb night last night... for here. Nabbed 8 Messier targets and was pretty pleased with the Orion 8" performance. The addition of the computerized focuser helped a great deal. I got pretty decent darks, flats and bias frames before the session using the "white t-shirt method" . I did very little processing with the images just some level adjustments in Apple Preview. 05/30/20 - Another good testing night. Got the Crescent Nebula (NGC6888) & the Fox Head Cluster (NGC 6819) with the 8" Newtonian "Narrow Field" imaging set-up and CLS filter. There is a slight amount of coma that I'll need to correct for, likely with another Baader MPCC coma corrector. Still waiting on the guidescope & ZWO guiding camera to complete this rig. Also tested out the Baader MPCC coma corrector on the 4.5" StarBlast Newtonian. It seems to have helped a great deal with the coma. Initially, I couldn't get front focus with the Baader and it's 55mm back focus requirement but the stop ring on the Baader can be removed and the entire coma corrector and spacing adapters can slip INSIDE the telescope's focusing tube. |
|||
| Antares Region NGC-7000 (North American Nebula) Sadr Region |
06/01/20
- Put the 4.5" modified Orion StarBlast to
the test last night. Got the guider dialed
in pretty well and the addition of the Optolong
CLS filter and the Baader MPCC coma corrector turn
this little "cheapie" into a decent imaging
platform. The main modification that I've
made is to replace the stock, plastic focuser with
a low profile Crayford. I'll next work on
getting its focusing computerized and, at some
point, upgrading the camera from the ST-8300 to
something like the ZWO ASI294. A few example
images are linked to the left. These were
all simple 4x300s images guided on the LXD-75. |
|||
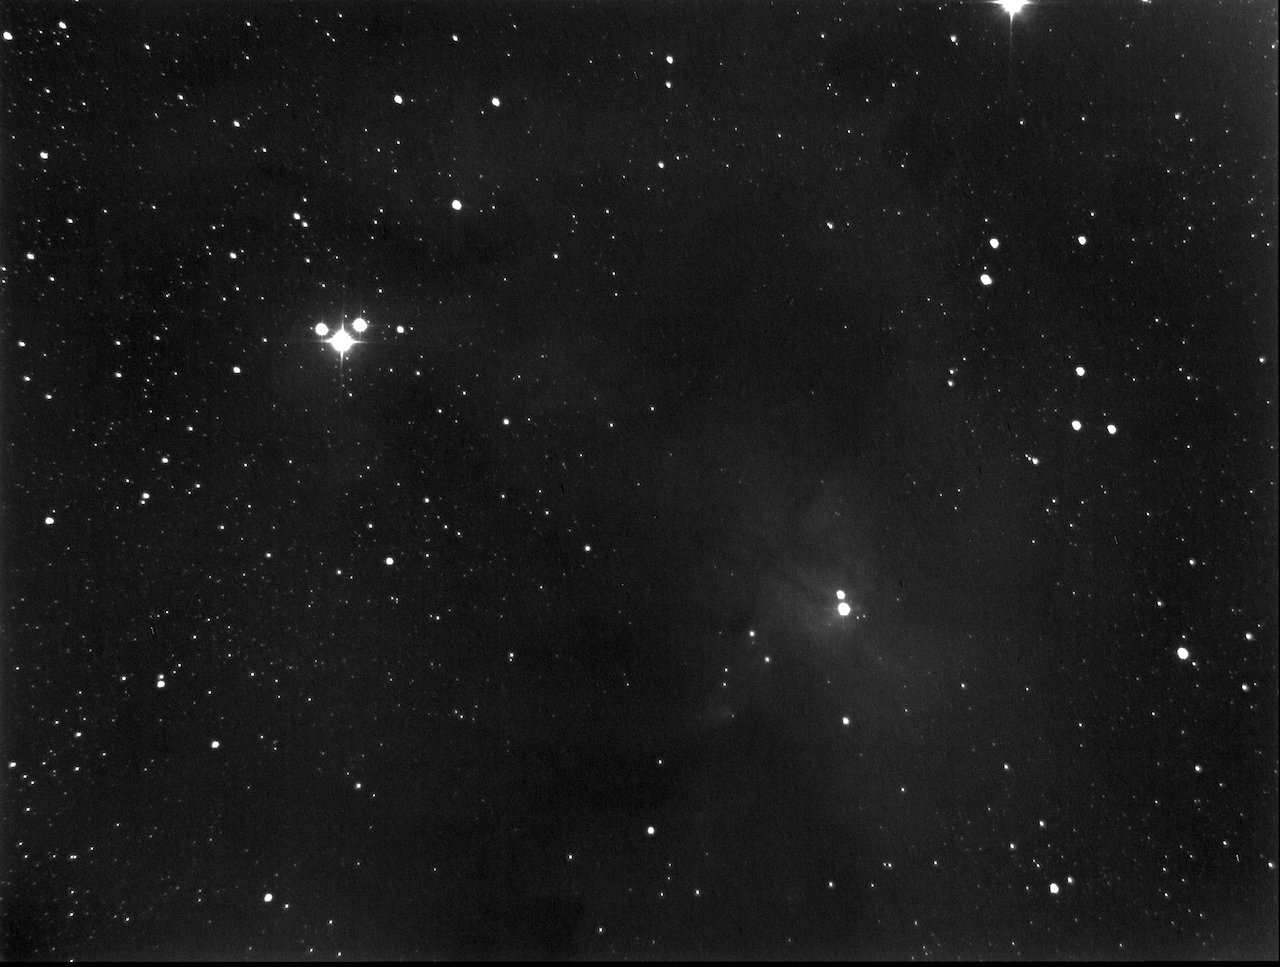
| Another Antares
Region Rho Ophiuchi Region |
06/10/20 - Another
nice evening to test the 4.5" StarBlast. I
flocked the inside of the OTA and it dramatically
increased contrast. The sample images to the
right are 6x300s with the Optolong CLS filter
& clearly show some of the nebulosity in the
region. I have this little imager dialed in
pretty nicely - it gets decent monochrome images
and guides very nicely using my MacBook Air &
PHD2. I'll soon get an electronic focuser on
it to complete the package. The guidescope
and guide camera for the 8" came in today and
should be up and going soon. |
|||
Neowise Portrait  |
07/23/20 - COMET
NEOWISE!!!! Had an epic night! Still
tweaking a bit with the 8" but getting it all
dialed in. I decided to hunt up comet
Neowise to see if it would image well - what a
nice surprise. It imaged beautifully and I
was able to capture its motion. Check out
the links to the left & below :-)
|
|||
Optolong L-Pro 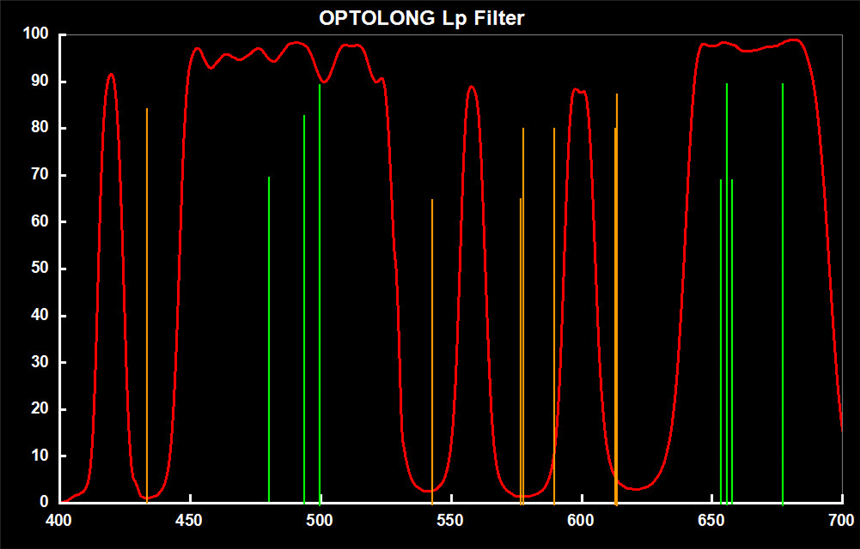 Optolong CLS 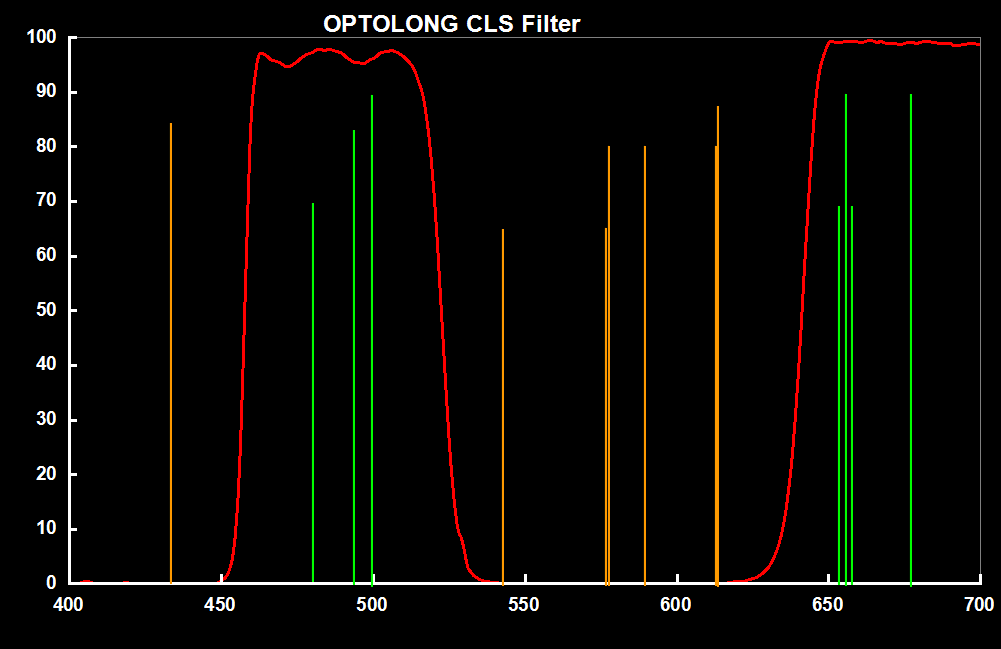 |
10/24/20 - Very
nearly have my two imaging systems finished.
I've added light pollution filters to each rig
(L-Pro to the 8" & CLS to the 4.5") and
flocked both telescopes. The flocking is
from FPI-Protostar (link
here) and is very simple to
install. The flocking eliminates almost all
of the internal reflections inherent in the OTA
and provides a velvet-like, jet-black surface that
should increase the contrast in my images
significantly. I should get the CMOS camera
for the 4.5" soon, as well as, the ZWO EAF
focuser. I've also began to use SiriL (link here)
to post-process images. It seems to be a
pretty user-friendly and cross-platform software
that can do some nice things like remove light
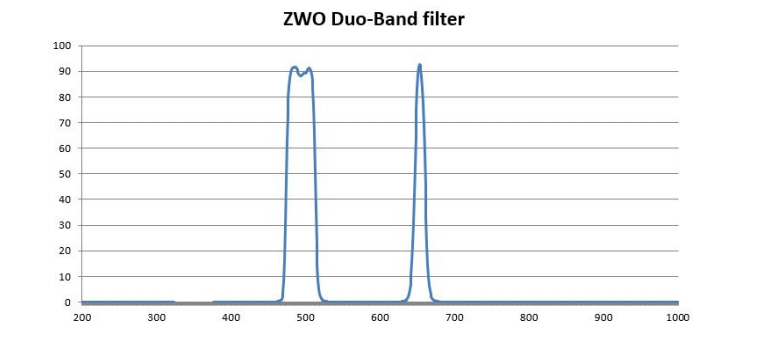
pollution gradients. 11/02/20 - Tested the effectiveness of the Optolong L-Pro last night and it definitely helps with the light pollution. It does increase the time for sub-exposures but not too badly. I now have three filters (shown to the left & below) that I can use for various targets: The two Optolong wide-band, light pollution filters for targets like galaxies, clusters and reflection nebulae & the dual, narrow band to accentuate the H-alpha and O-III in emission nebulae. ZWO Dual
Narrow-Band
 |
|||
|
Unprocessed image
 Processed, Stacked
Final Image
 |
11/04/20
- I've been working on my
post-processing skills using the free,
open-source software SiriL. I'm not
a big fan of using software to basically
"paint" the image as one would like,
instead SiriL just does the essential
processing that I would normally do on an
image but automates and enhances some
capabilities. I use SiriL in a
4-step process that takes just a few
minutes to produce a pretty nice
result. A raw, unprocessed, single
image and the final result are linked to
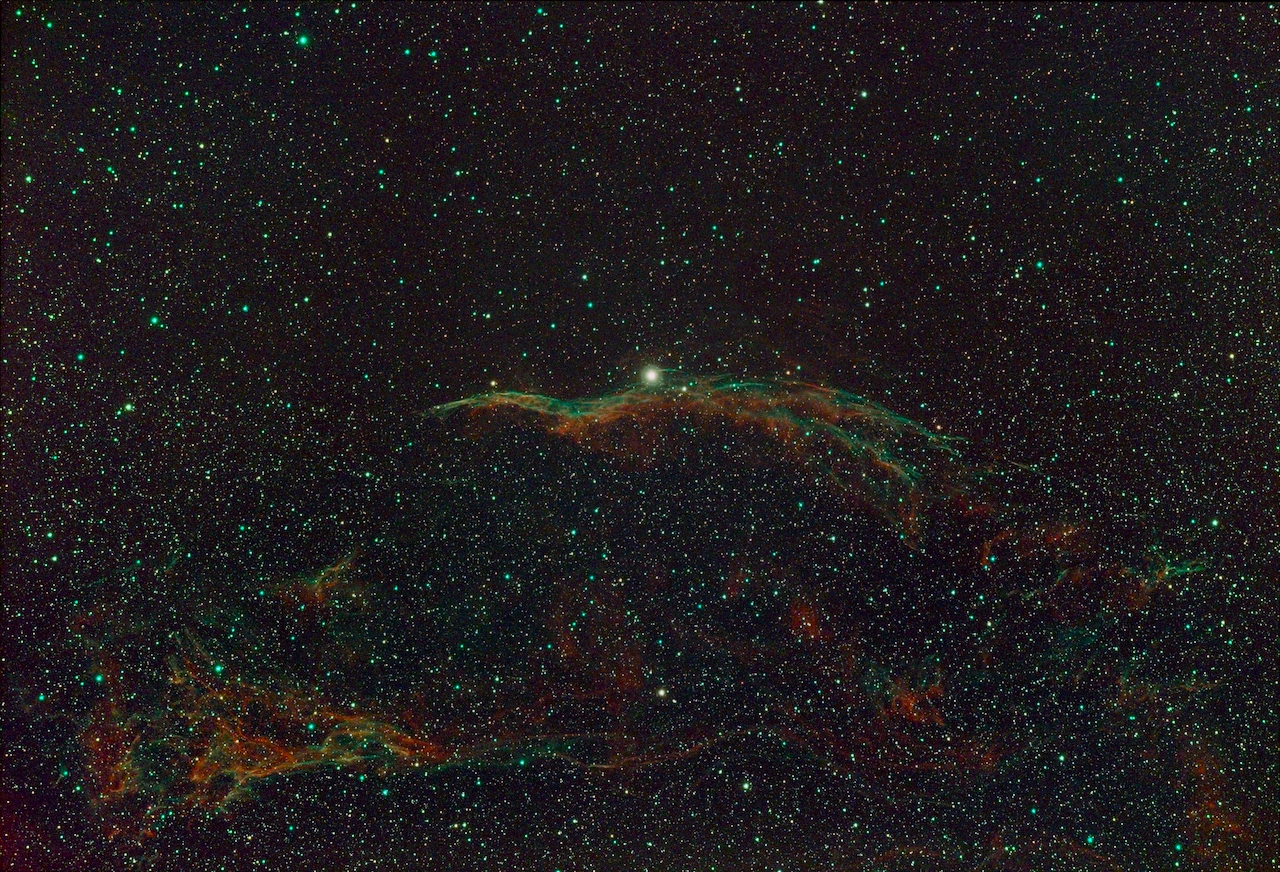
the left. These images of NGC 6960
(the Western Veil Nebula) were taken by
Todd from his backyard
in Manhattan, Ks under Bortle 5 skies. 1) I use a supplied script that "pre-processes" all of the images by applying dark, bias & flat frames, rejecting unacceptable (blurred) images, aligning, normalizing and sum-stacking. 2) Next, I color calibrate using SiriL's photometric calibration if possible or manually if necessary. 3) Then, SiriL has a nice little routine for getting rid of the light pollution gradient where it selects a hundred or so small regions in the image that don''t include a star or anything else (like nebulosity) that significantly changes intensity from neighboring pixels and calculates what a common background level should be and applies that. 4) Finally, I use the Asinh and histogram to adjust the image so I get a nice, pleasant looking result. Any further cosmetic "touch-ups" I want I do in Apple Preview to boost color saturation or change overall brightness of the image and convert it to a jpeg so that I can post in on the web-page. |
|||
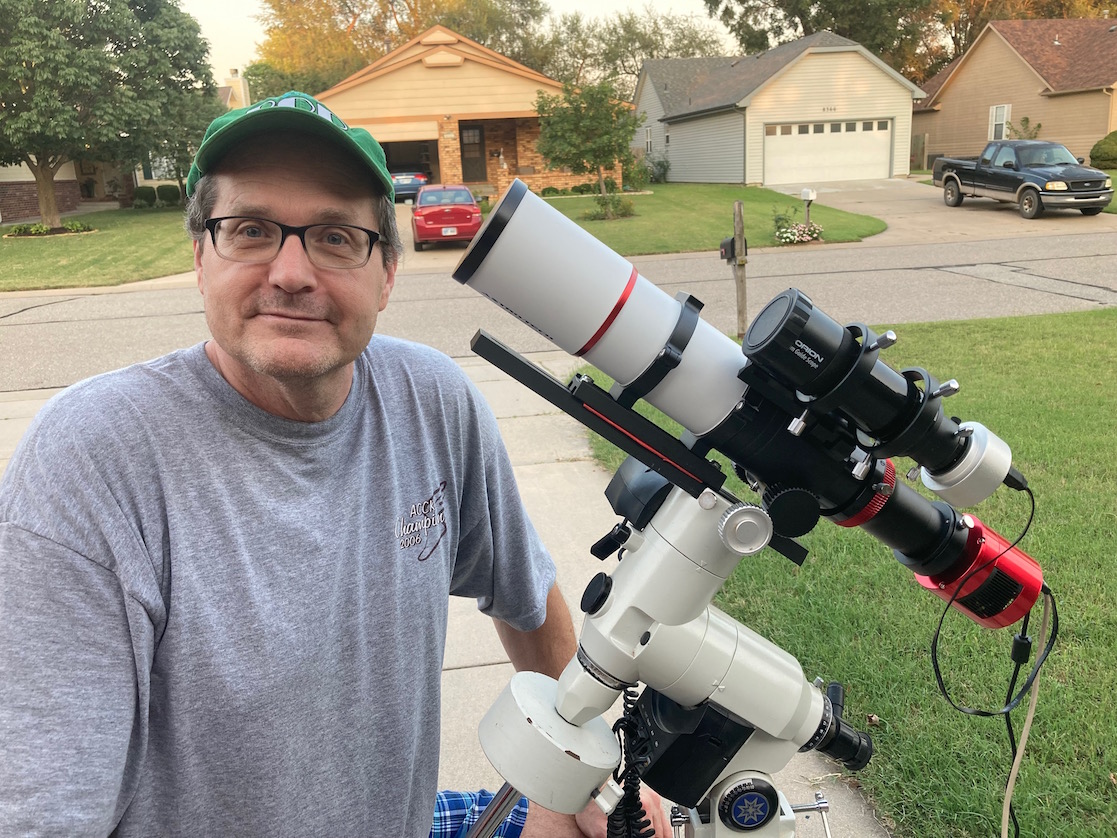 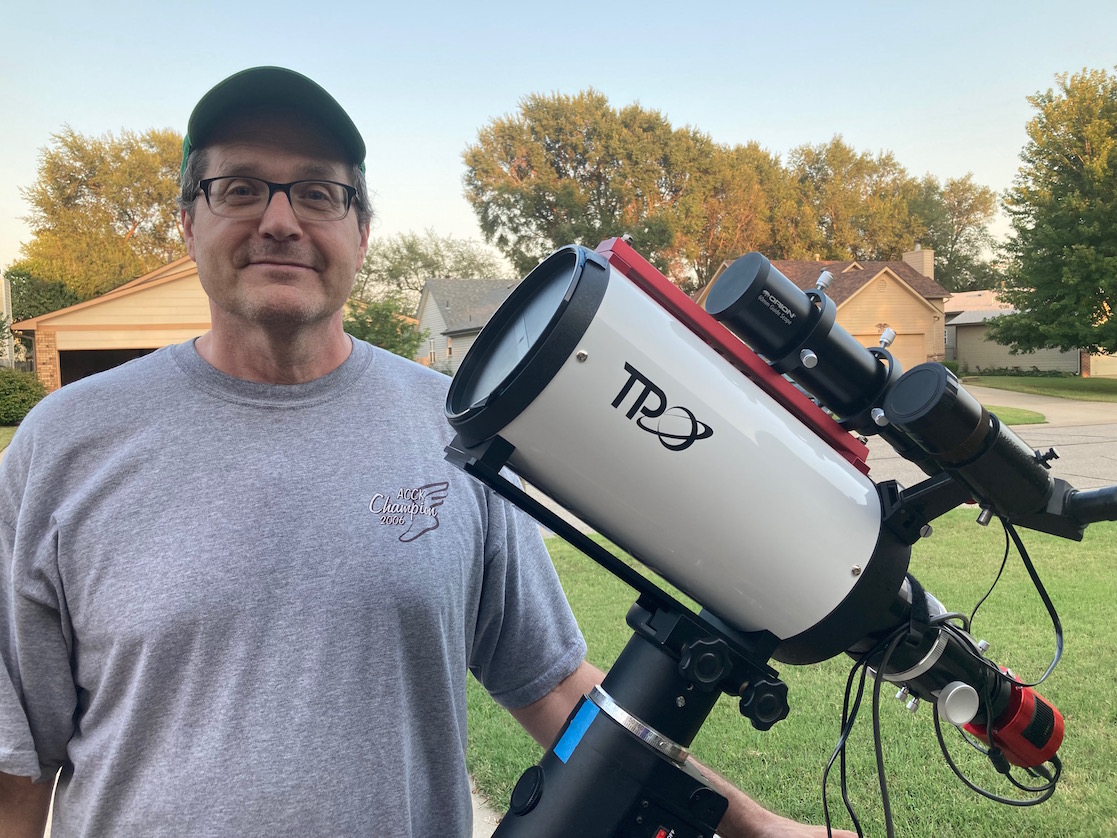 |
10/05/21
- I've settled on two upgraded
imaging telescopes/mounts: The
wide-field AT72ED II on the Meade LXD-75
and the narrow field TPO 6" RC on the
Orion Atlas. Both seem to guide well
and can take pretty good images using the
ZWO CMOS cameras. The light
pollution is pretty bad here (~Bortle 7)
but I can still image lots of targets, as
long as they are relatively bright and/or
emission nebula. To get dim,
non-emission type objects like most
galaxies, planetary nebulae and reflection
nebulae, I have to travel to darker
skies. My next project is to locate
two dark sky sites where I can
conveniently travel to get the more
difficult targets. One potential
location is several miles south of Beloit,
Ks and the other is in northeast New
Mexico. We're (my brother and I) are
going to evaluate these sites over the
next few months - Road Trip! 11/01/21 - Finished the imaging train of both telescopes. On the refractor, I added an ATRF72 0.8x Focal Reducer/Field Flattener that takes the effective focal length from 430 mm down to 344 mm. Not only does it reduce the focal length, and therefore f ratio (f/6 to f/4.8), but it significantly flattens the field and eliminates the field curvature inherent in such a short focal length refractor. On the RC, I installed the Astro-Physics CCDT67 set at 0.79x focal reduction. This took the effective focal length from 1370mm, which was a bit too much for my mount and skies, to 1079mm. I really like this field of view for the RC (~ 36' x 36') and seems to be working pretty well. |
|||
CLS vs LED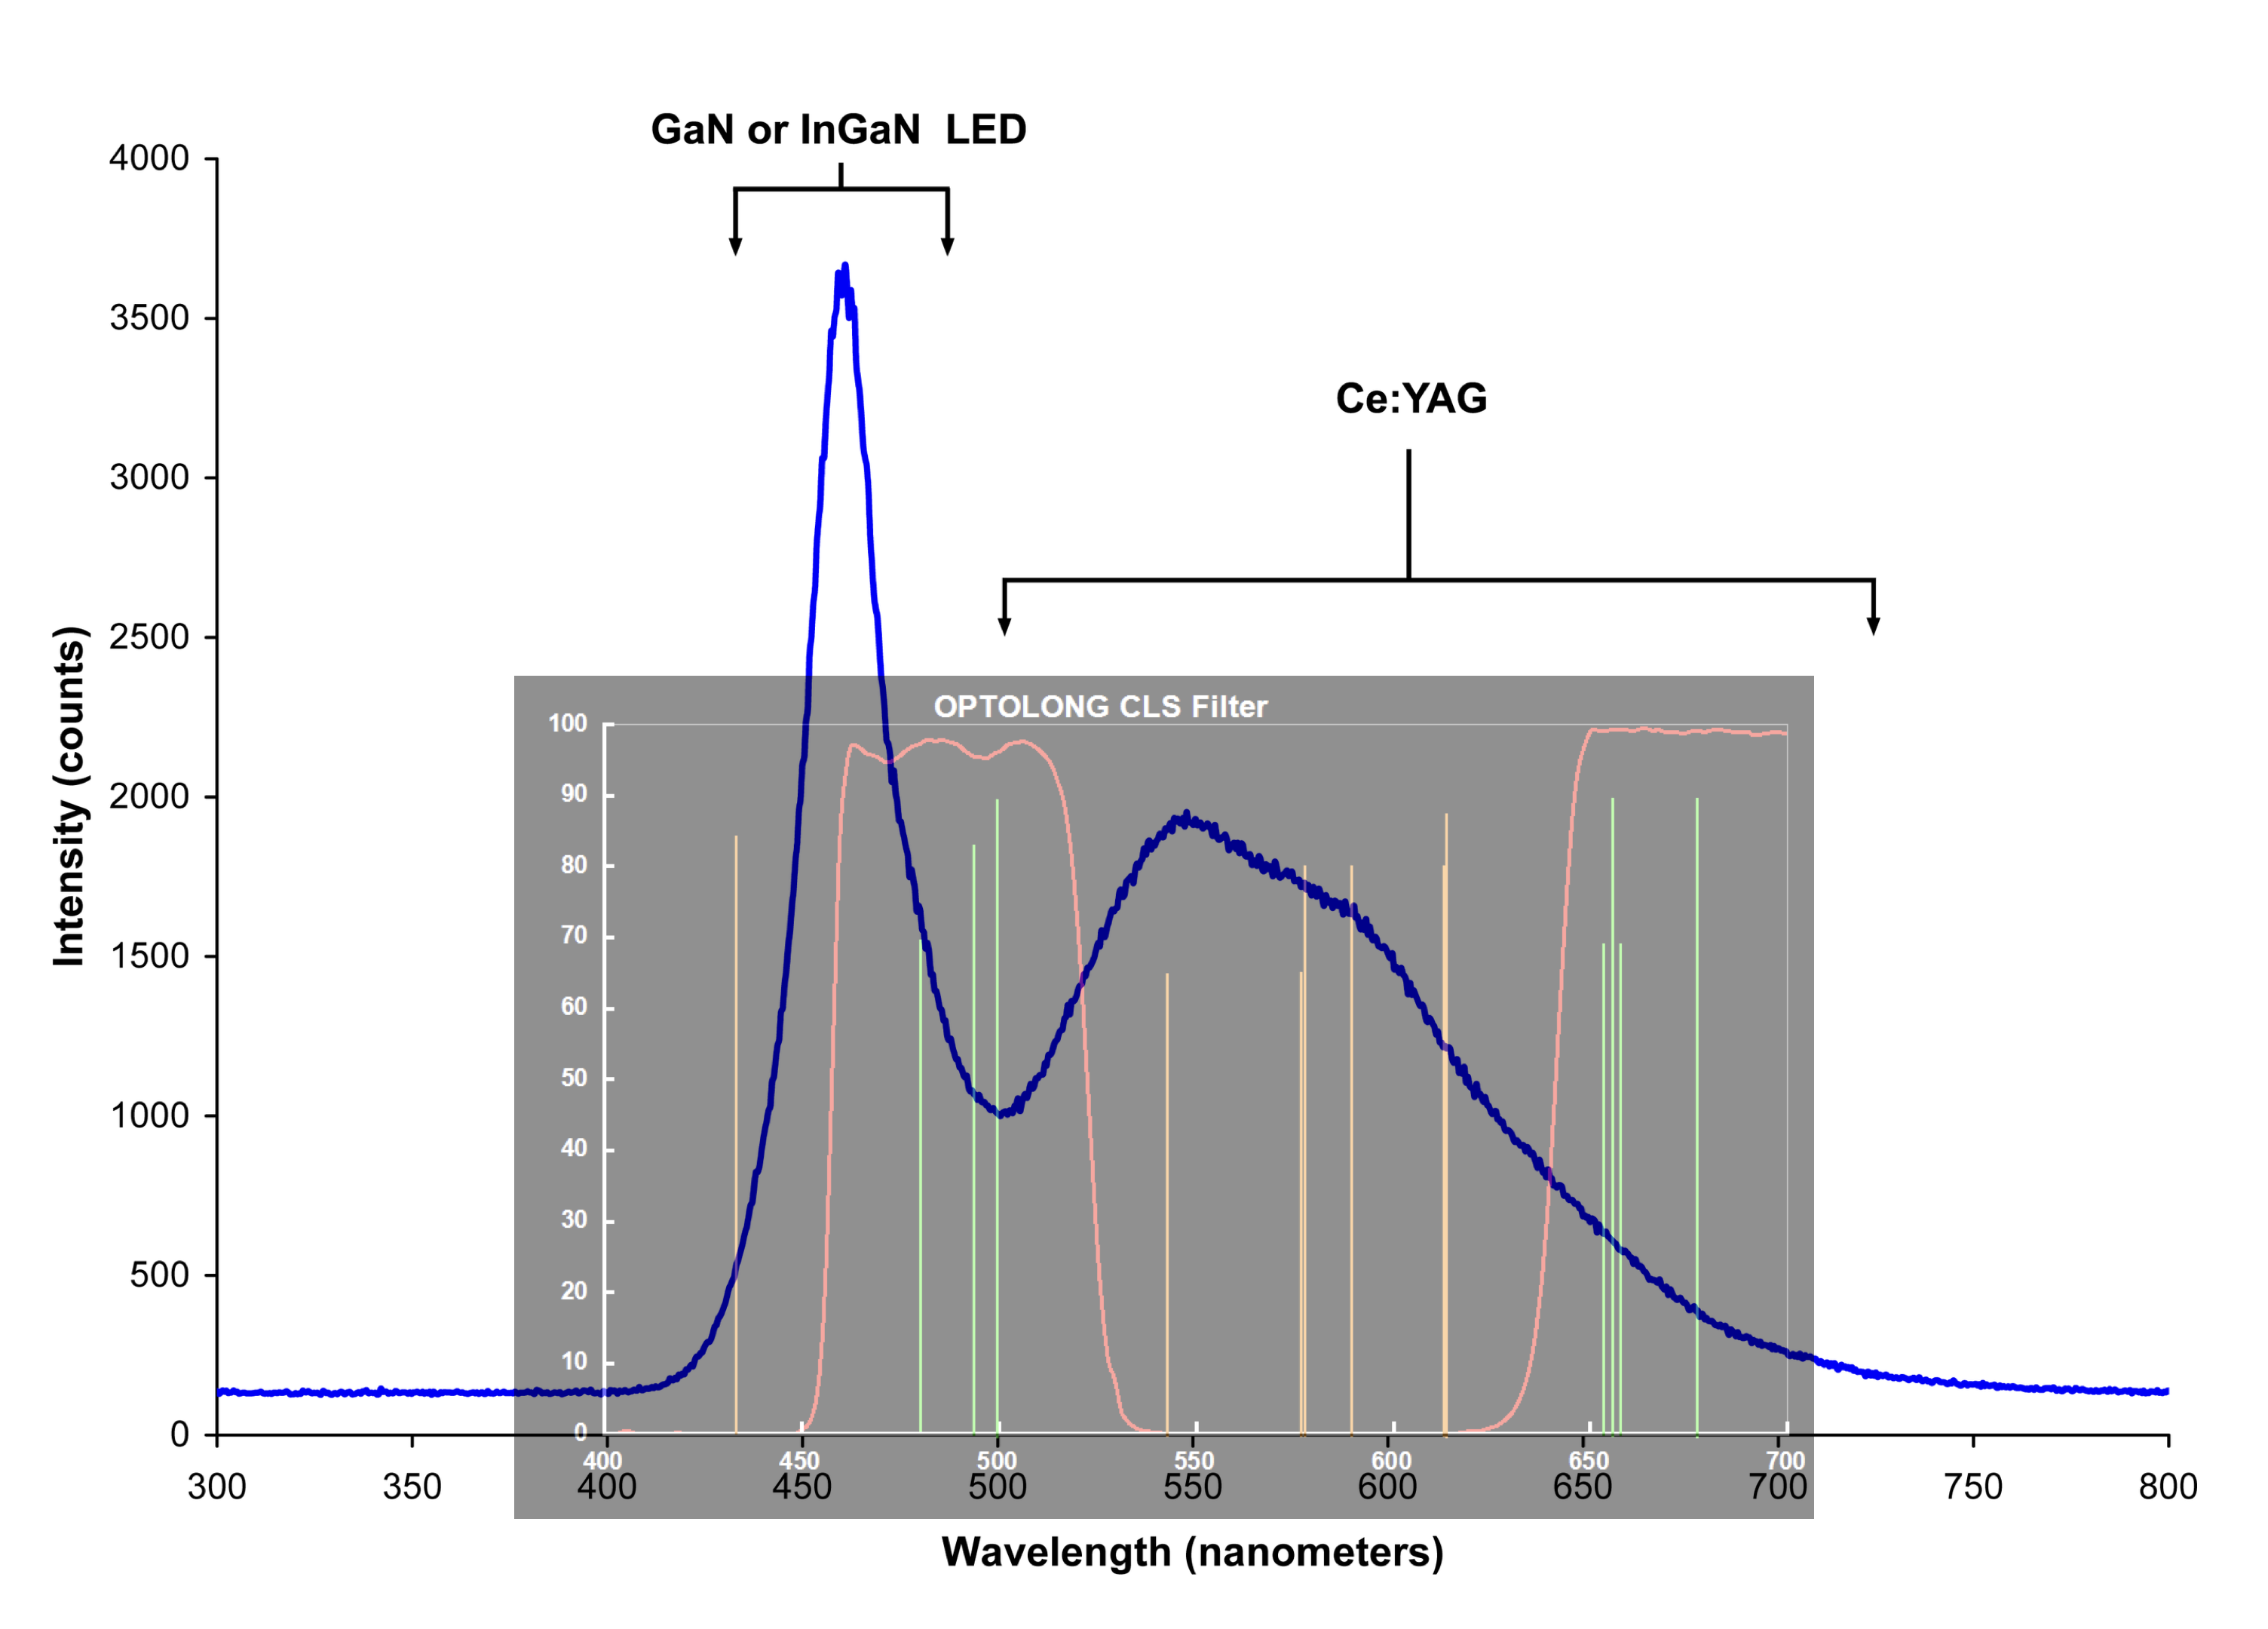 L-Pro vs LED 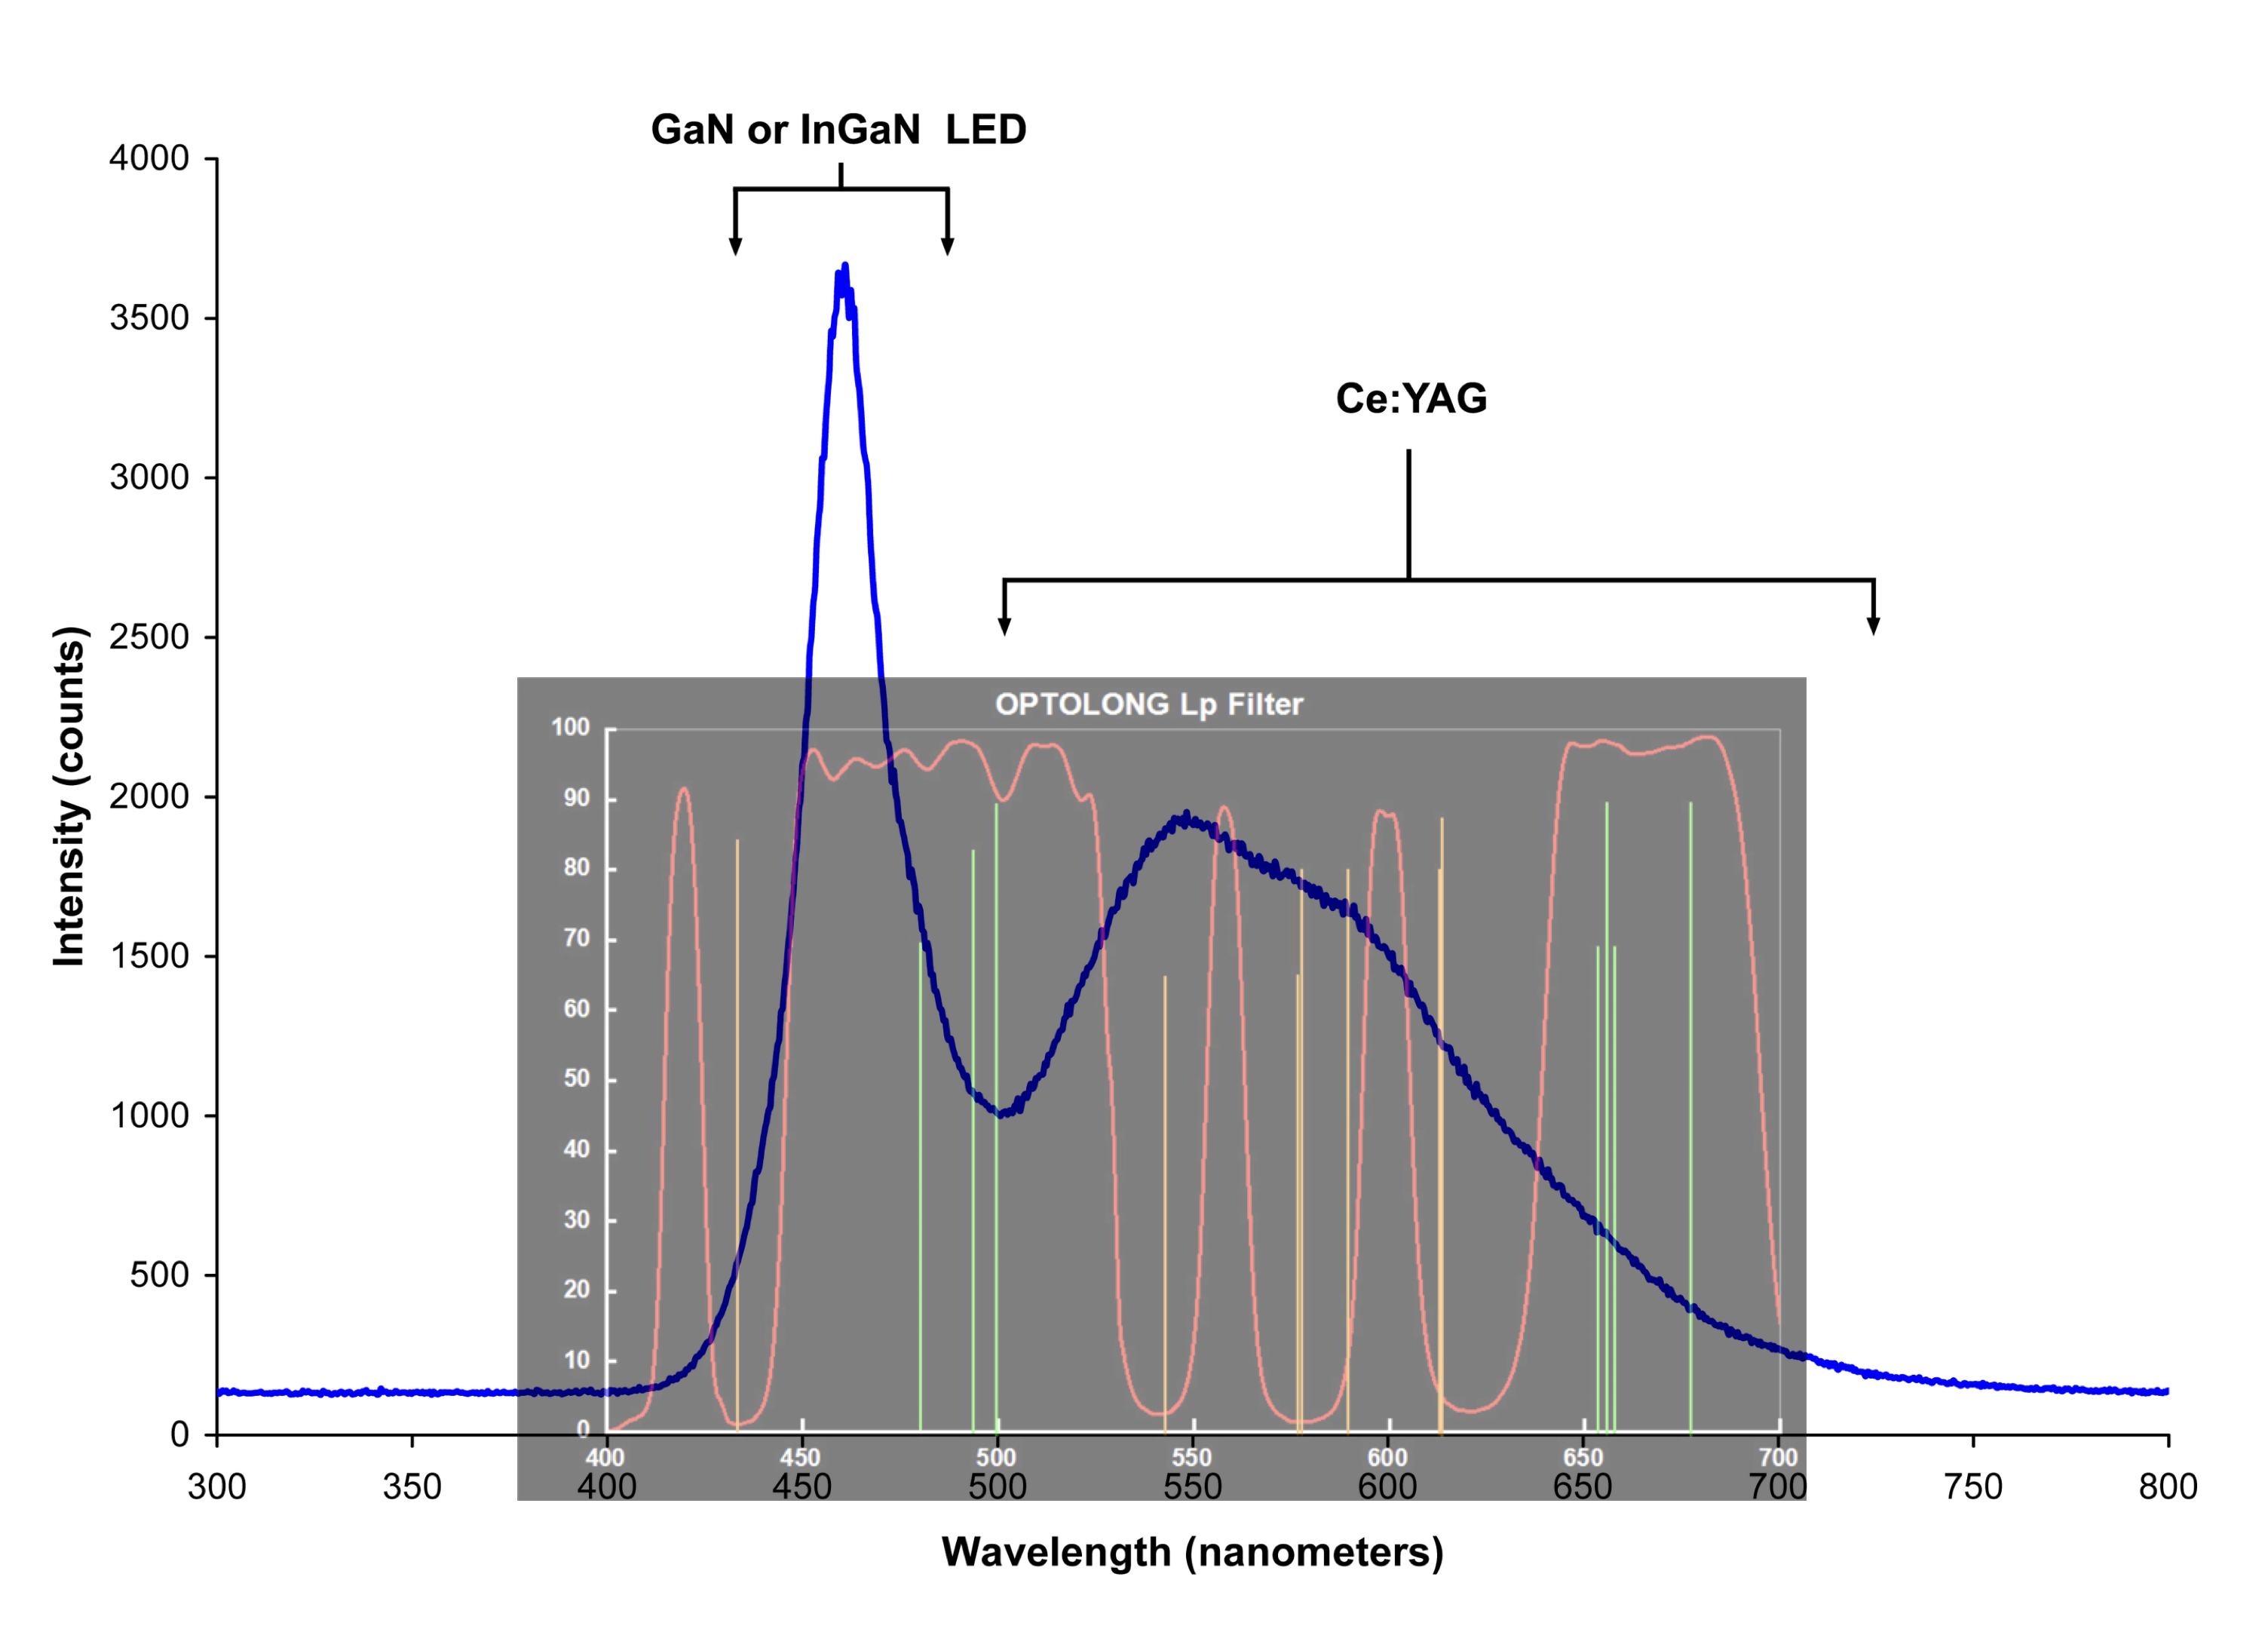 |
02/17/23
- It's been a couple
of years since last I
entered any "blog-like"
information. I've
been having pretty good
success with my two
imaging rigs and getting
better at my imagining and
processing routines.
However, I've noticed that
my imaging of broad-band
objects like galaxies
& planetary nebulae
are much more difficult
and my light pollution
filters are less effective
than they used to
be. This has
corresponded to the city
installing all white LED
street lights. I
think LED street lights
are great for many reasons
but they really make
imaging certain objects
much more difficult.
It seems the best solution
is to become more mobile
and simply go to dark
skies more often. As can be seen in the images to the left, the output of the white LED street lights (white background with blue data) superimposed onto the band-pass of the both the CLS and L-Pro filter show that the LEDs are really bright in the wavelengths that the filters pass. I might experiment around a bit and see if I can come up with some acceptable solution. |
|||
Todd &
16" Lightbridge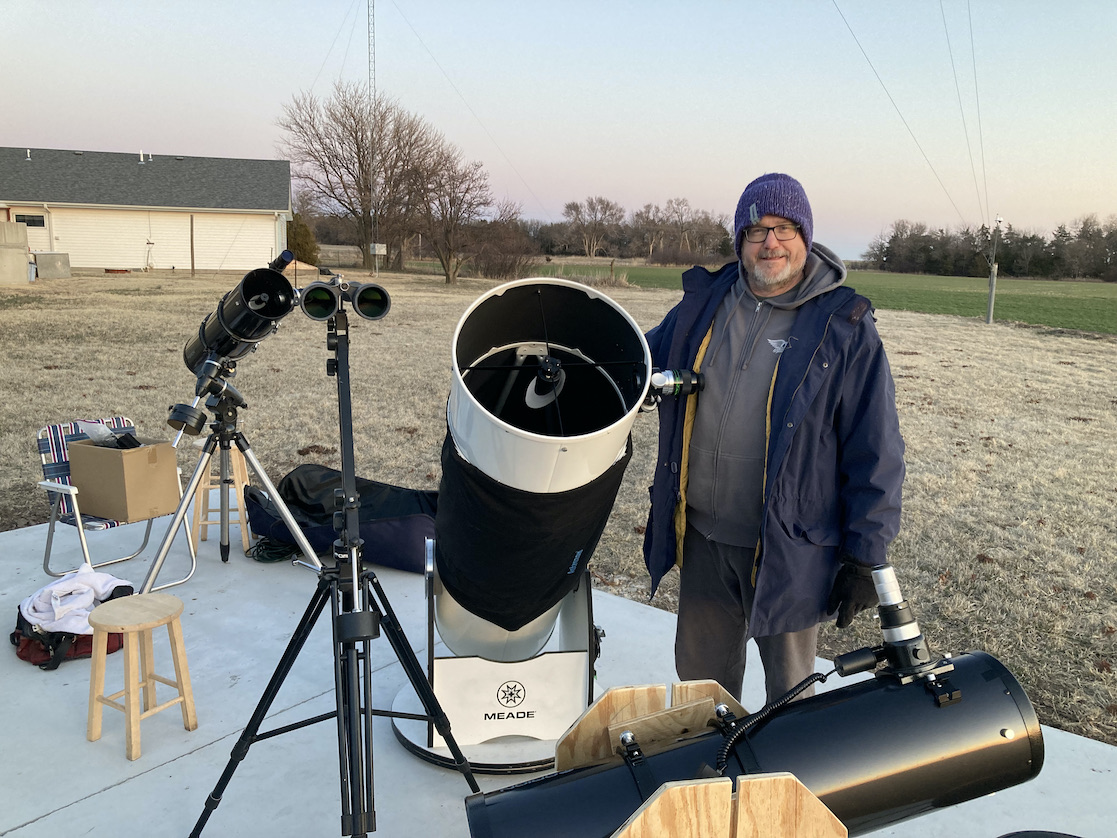 Me w/8" Dob 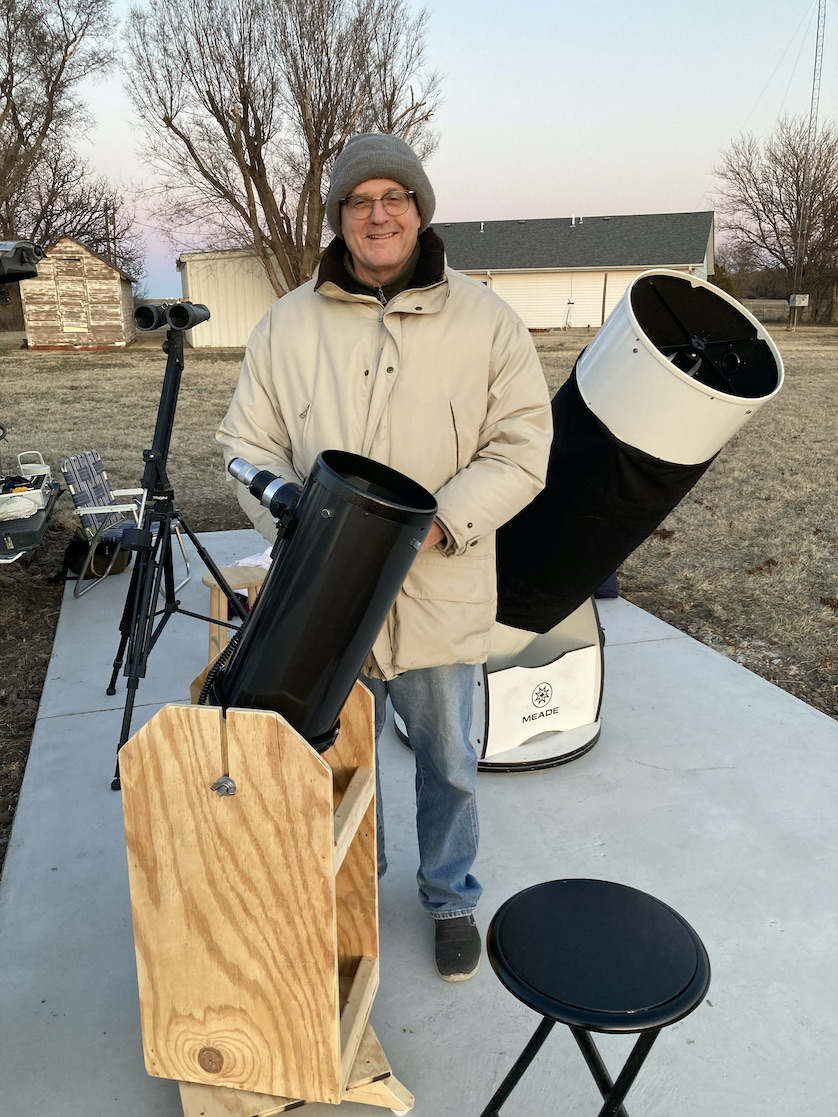 |
03/20/23
- Messier Madness
2023! We held
another Messier Marathon
on Saturday, Mar 18.
The night was very clear
and transparent but
bitterly cold. My
brother Todd and I bagged
103 targets! We did
this entirely visually
with Todd's 16"
LightBridge™ and my 8"
Dob. It became
apparent that the 8" was
slower and more
troublesome than I
would've expected.
It was very difficult to
definitively tell if I was
indeed seeing one of the
targets, especially the
dim, small galaxies.
In the end I abandoned the
8" and Todd & I worked
together for the rest of
the night. We had a
blast and have decided
that we're going to
continue the
festivities. In the
future, instead of doing a
one night affair, we're
going to split it up into
two half-marathons which
will be much more
manageable & perhaps
elicit broader
participation.
Staying up all night in 5˚
weather really takes it
out of you and takes a
couple of days to recover
:-) |
